
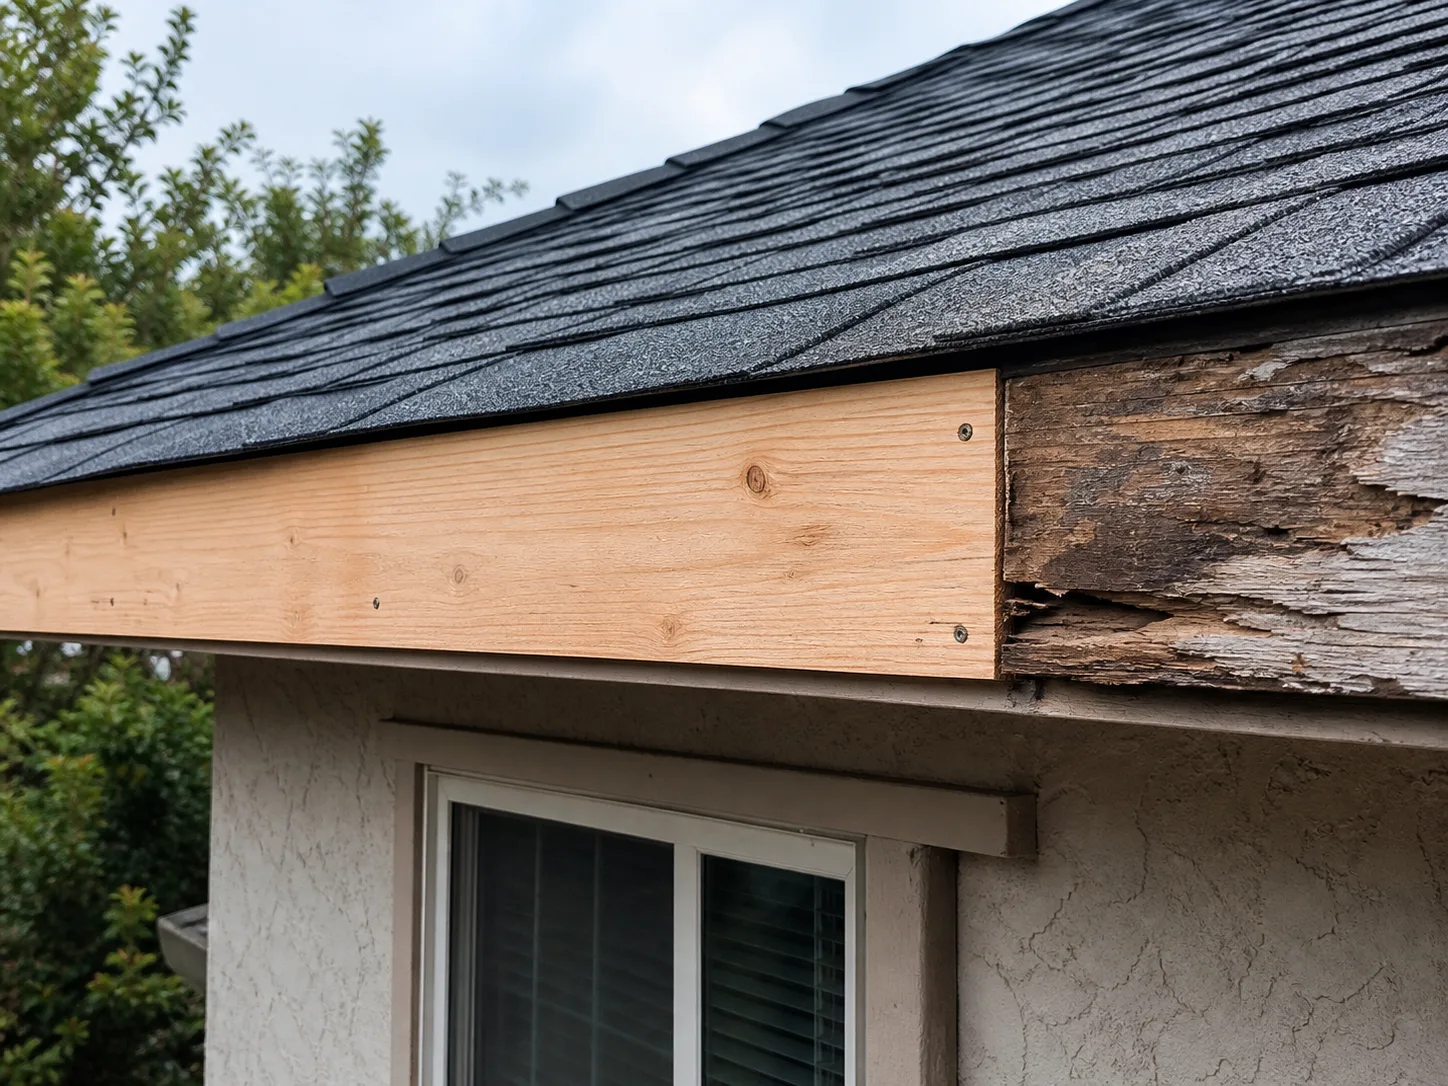
What homeowners often miss
New material can hide damaged wood—but it cannot stop the moisture that caused it.
Wood decay is the result of a moisture condition, not the original problem. Replacing only the most visible board can leave the water path—and sometimes adjacent damage—unresolved.
Century separates what is visible from what is confirmed, then reviews any scope change before additional correction proceeds.
Start with the source, not the surface
At a roof edge, recurring moisture may be connected to flashing, failed coating or sealant, overflowing gutters, roof runoff, or another nearby transition. The repair sequence should begin by identifying how the wood became wet and correcting that route wherever the project scope allows.
Appearance does not define the full extent
Peeling paint or discoloration can be an early warning, while softened or deteriorated material may extend behind the exposed face. Careful inspection helps distinguish a finish problem from wood that no longer provides a sound substrate. Concealed conditions may only become clear after affected material is opened.
The order of work protects the repair
A durable correction addresses the moisture path, removes or repairs affected material as appropriate, confirms suitable adjacent conditions, and then restores the roof-edge or gutter assembly. That order matters because fresh wood placed back into an unresolved wetting condition remains vulnerable.
What the inspection considers
- Likely moisture entry and runoff path
- Fascia, eaves, and accessible decking
- Adjacent wood and concealed-condition clues
- Roof, flashing, and gutter interfaces
- Repair sequence and documented scope
Technical references: USDA Forest Products Laboratory: Wood Decay in Buildings